
Get started with Claude's AI code assistant if you are not a developer
Two birds with one stone: learn Claude Code and fix Spotify's horrible shuffle mode

AI-based software development assistants have evolved a great deal since GitHub Copilot's launch in 2022 - from code autocomplete assistants (e.g., GitHub Copilot, Cursor) to desktop-based coding agents (e.g., Cursor, Claude Code, Codex, Cline) and finally to cloud-based agents fully integrated into CI/CD cycles (e.g., Codex, Lovable, Bolt.new, v0, CodeRabbit).
Part of their promise is that anyone can dream up an app and launch it on their own, whether they are students, product managers, office workers, or C-level execs.
In reality, some of the most powerful desktop-based agents, such as Claude Code and Codex, require the use of the computer's Terminal window and can intimidate users without a technical background.
This post has two goals:
Help you get started with Claude Code if you are a non-technical user.
Boost your motivation to learn by offering a solution to Spotify’s most frustrating feature: the shuffle mode that’s not random.
Problem to solve: Spotify’s shuffle mode
Spotify’s shuffle mode does not feel random at all. If you have 1000+ tracks in a playlist, you have probably experienced the frustration of hearing some tracks play dramatically more often than others. Spotify denies it, and the internet doesn’t believe them.
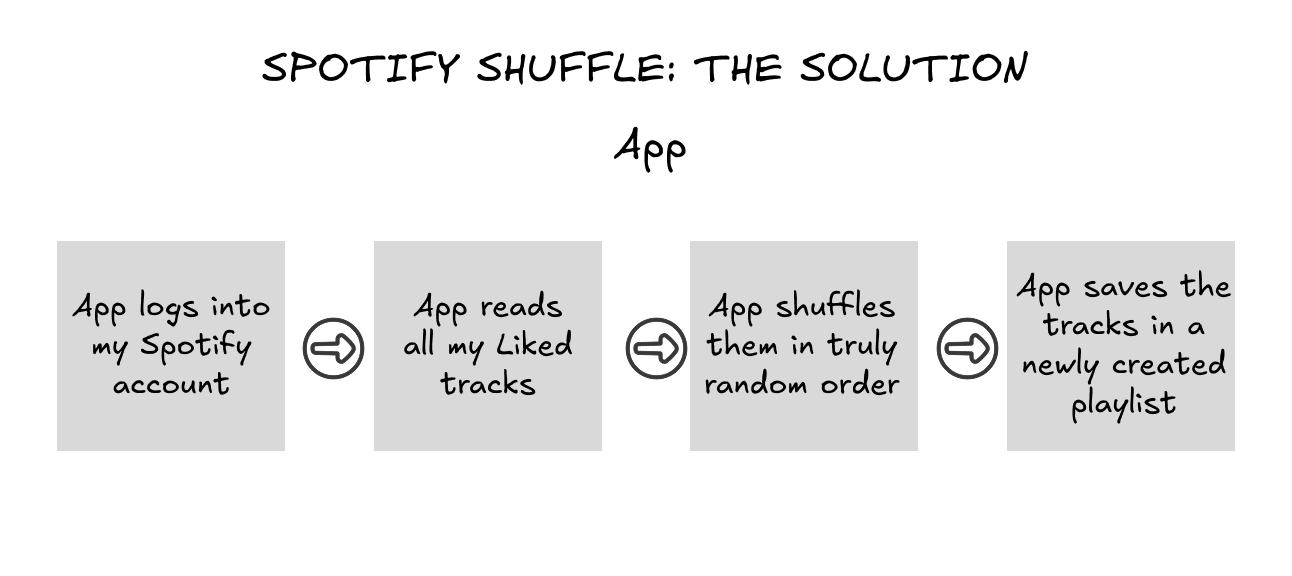
So, here is your motivation for learning to use Claude Code: we are going to build an app that takes all your liked tracks, shuffles them, and stores them into a new playlist. This way, you can listen to the newly created playlist from beginning to end, and that means you'll be listening to your liked tracks in a truly random order.
How to use Claude Code
In this tutorial, we choose to provide precise instructions to Claude Code instead of simply writing, “create an app that does this and that.”
Both approaches are possible, but high-level vibe coding runs the risk of taking the coding assistant into dead ends. By using precise instructions, we can ensure that the app’s architecture is logical and that the code remains stable as the app expands.
As a user of coding agents, your mindset should be that of a product manager rather than a business user: you don’t need to write code, but you need to have a clear understanding of the workflows, data structures, and third-party integrations that your project requires, and you need to be able to communicate them clearly to coworkers (in this case, the agent).
Prerequisites
In this post, we assume that you want to be able to use Claude Code on your laptop, and that you are using an Apple computer (running macOS).
Developing on your laptop is different from using a web-based coding platform like Lovable, Bolt.new, or v0, which takes care of all the underlying setup for you.
Even though coding assistants have made coding much easier, an initial configuration is required to enable your laptop to support software development if it’s your first time doing it. You only need to do this once.
You also need to register for third-party services such as Spotify and Anthropic’s Claude. Let’s go through each prerequisite.
Spotify developer account
In your browser, go to spotify.com and log in with your regular account.
Then, go to https://developer.spotify.com/, click on your user ID in the top right corner, and go to the dashboards (after accepting some terms and conditions). Create an app, using http://127.0.0.1:8080/callback as the redirect URI.
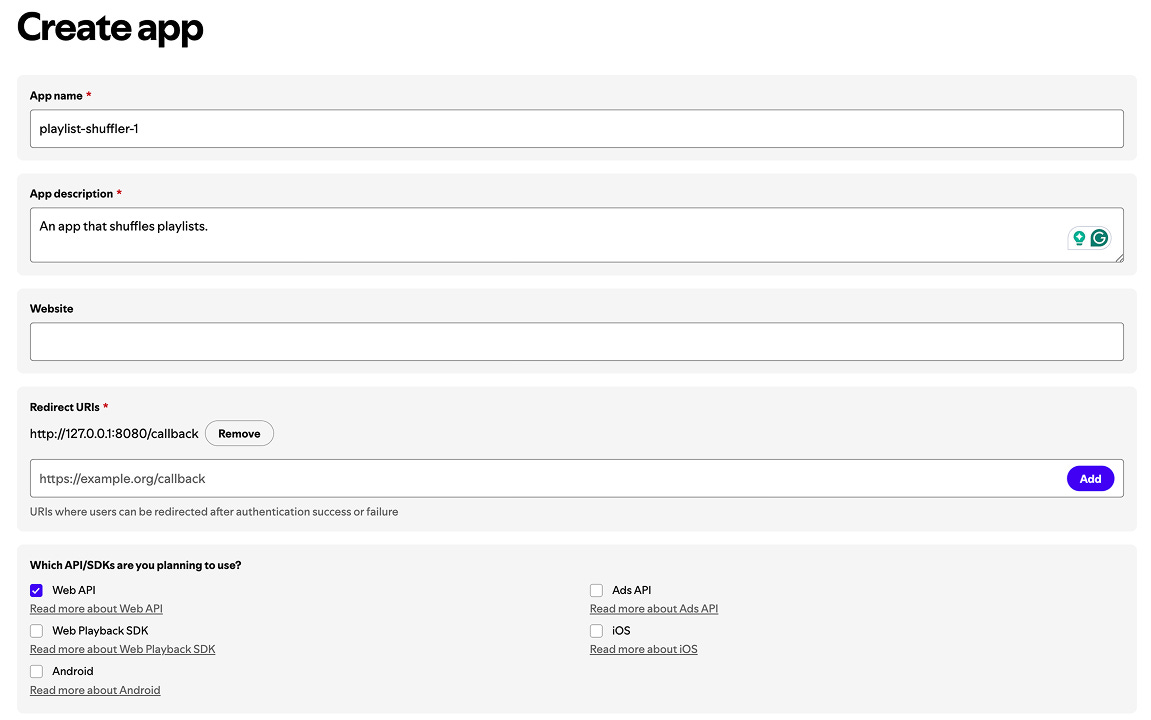
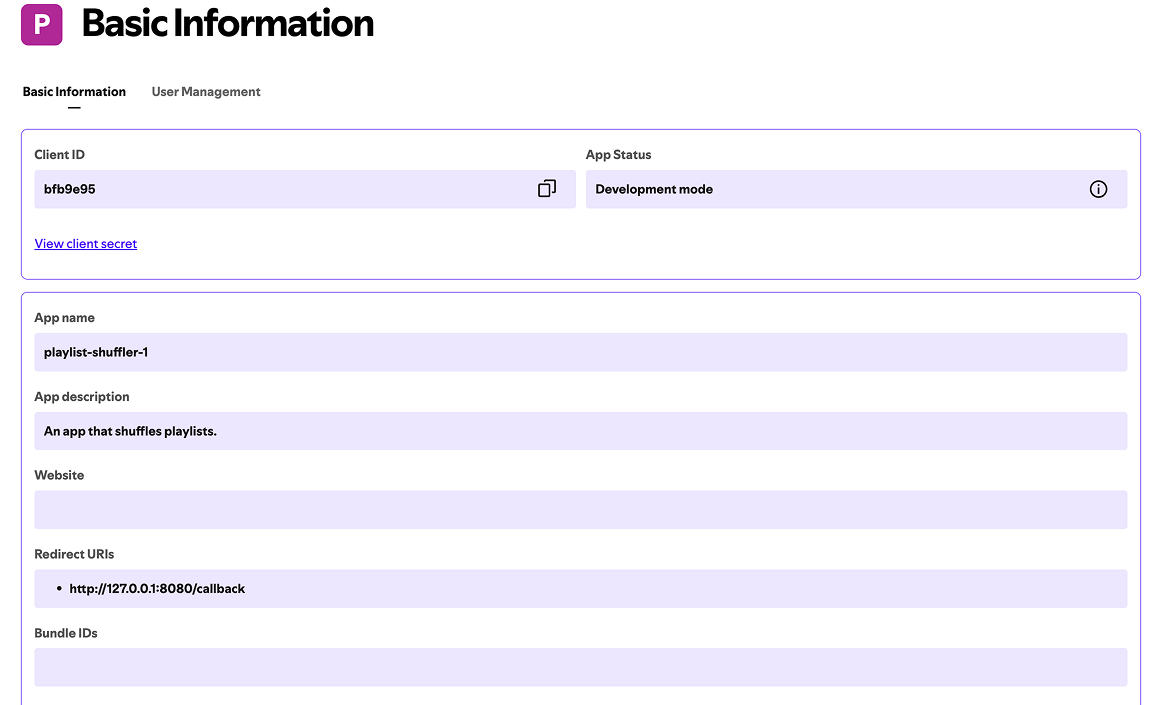
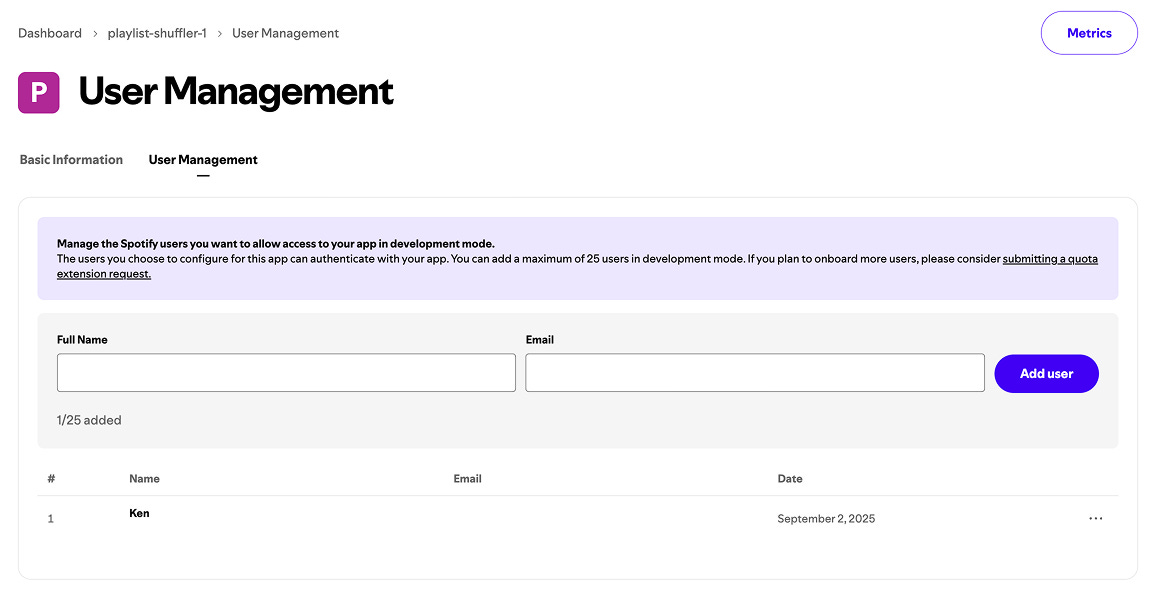
After creating the app, save the Client ID and Client Secret somewhere for future reference. In the “User Management” tab, add yourself as a development user (with your full name and email address associated with your Spotify account).
Code editor (IDE): Cursor
Install Cursor by downloading it from this link.
XCode command line tools
This app is a utility required for coding on Apple devices. Open the Terminal application on your laptop and execute the following command:
xcode-select --installPackage manager: Homebrew
Install Homebrew by following the instructions at this link: open the Terminal application on your laptop and execute the following command (on a single line):
/bin/bash -c "$(curl -fsSL https://raw.githubusercontent.com/Homebrew/install/HEAD/install.sh)"Python
Restart the Terminal. Execute the following commands to install Python, a popular programming language:
brew install xz
brew install readline
brew install pyenv
brew install pyenv-virtualenv

echo 'export PYENV_ROOT="$HOME/.pyenv"' >> ~/.zshrc

echo '[[ -d $PYENV_ROOT/bin ]] && export PATH="$PYENV_ROOT/bin:$PATH"' >> ~/.zshrc

echo 'eval "$(pyenv init - zsh)"' >> ~/.zshrc
Restart the Terminal. Then:
pyenv install 3.11
pyenv global 3.11
JavaScript Node (NodeJS)
Restart the Terminal. Execute the following commands to install JavaScript Node, another popular language that’s required to run Claude Code. (See official instructions at this link).
Execute this command on a single line:
curl -o- https://raw.githubusercontent.com/nvm-sh/nvm/v0.40.3/install.sh | bashRestart the Terminal. Then:
nvm install 22
node -v
nvm current
npm -v
Claude Code
Go to claude.ai and create an account if you don’t already have one. To use Claude Code, you need to pay for a Pro subscription ($20/month).
Restart the Terminal. Execute the following command to install Claude Code. (See official instructions here).
npm install -g @anthropic-ai/claude-code Project folder
You need to create a project folder on your laptop. For example, using the Mac’s Finder app, create a folder called ‘spotify-shuffler’ in the Documents folder.
Then:
Open Cursor and open the folder that you just created.
Open Terminal and type cd ~/Documents/spotify-shuffler to move to the project folder.
In the Terminal, create a Python virtual environment, using Python version 3.11, which will isolate your work from the rest of your laptop.
pyenv virtualenv 3.11 spotify-shuffler-1

pyenv local spotify-shuffler-1
Install the libraries that you’ll need for the app: although you could ask Claude Code to install dependencies for you, it’s generally safer and more effective to decide which ones you’ll use.
Using Cursor, create a requirements.txt file with the following contents:
python-dotenv
requests
flask
Then, install the dependencies:
pip install -r requirements.txtNow, let’s start Claude Code:
nvm use 22
claude
/init
Select basic settings (such as dark mode, standard settings) and log in with your Claude Pro subscription. Press Enter until Claude Code is running.
Arrange the two windows side by side. Now, your screen looks like this:
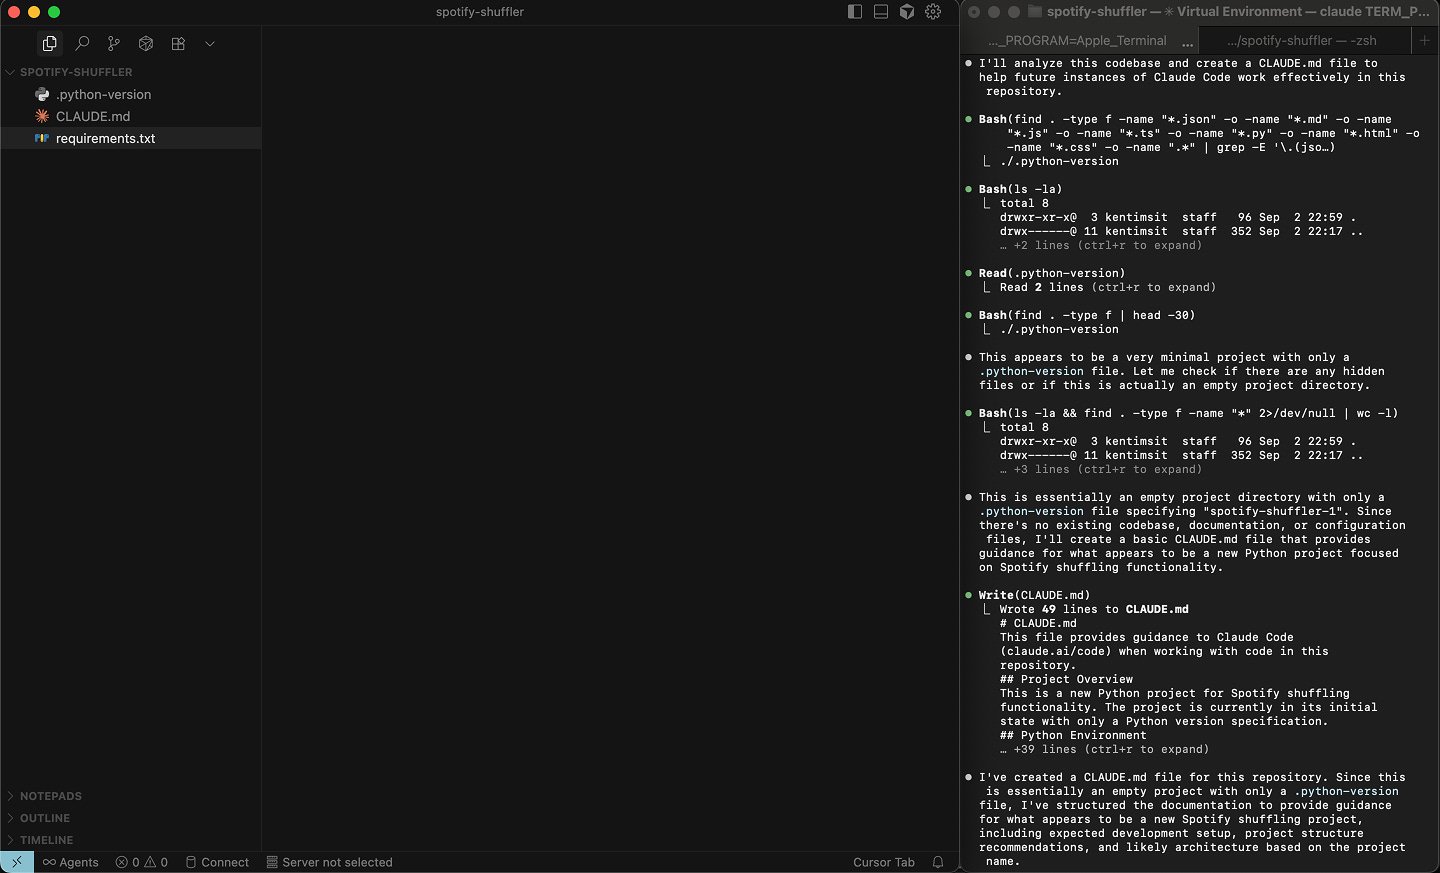
In Cursor:
The .python-version file contains the name of the virtual environment.
The CLAUDE.md file contains documentation used by Claude Code to track the project's workflow.
The requirements.txt file contains the dependencies that we have defined.
Let’s start coding
Now, we are ready to create code by giving instructions to Claude in the Terminal window.
A key working principle of this post is that Claude Code must be guided precisely if we want to control the quality of the output. This is the difference between “vibe-coding” for fun and using Claude Code to create quality software.
Each of the steps below describes a specific task that leverages Claude Code to get work done. Usually, after each instruction, Claude Code thinks for a while and asks you to validate code changes. Review these changes and click 'Yes' if Claude’s messages appear to make sense.
Inform Claude about what we’ve already done
Instruct Claude:
The name of the local virtual environment (created with pyenv virtual env) is `spotify-shuffler-1`. It is activated with pyenv local. The following dependencies have already been included in the requirements.txt file and installed: python-dotenv, requests, flask. Update CLAUDE.md accordingly.Save the Spotify credentials in the project folder
You need to execute this task yourself. Using Cursor, create a .env file and input the Spotify Client ID and Client Secret in this format:
SPOTIFY_CLIENT_ID=xxx...
SPOTIFY_CLIENT_SECRET=xxx...
Then, save the file:
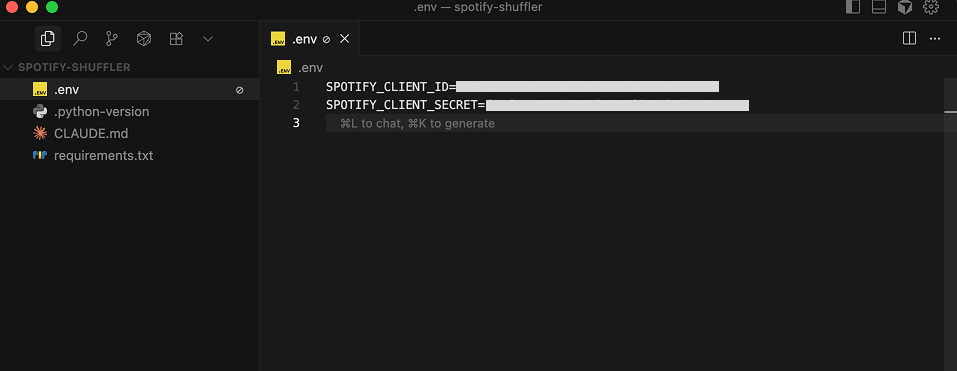
Create a web app to log into Spotify and store credentials
Instruct Claude:
Create a Flask app called `login.py`, which opens a local web page at http://127.0.0.1:8080 and allows the user to log in to their Spotify account. It then obtains access tokens and refresh tokens and saves them to a local file (spotify_tokens.json).

Ensure that you use the official Spotify API documentation at https://developer.spotify.com/documentation/web-api, specifically the "Authorization Code Flow" for authorization.

Note that the redirect URI declared to Spotify is http://127.0.0.1:8080/callback, as localhost is no longer accepted by Spotify.

Note that the Spotify app credentials are already stored in the .env file, which can be loaded with python-dotenv. The relevant environment variables are SPOTIFY_CLIENT_ID and SPOTIFY_CLIENT_SECRET.

The login flow must allow the app to use the following scopes:
Users
* user-read-email
* user-read-private
* user-personalized
Playlists
* playlist-read-private
* playlist-read-collaborative
* playlist-modify-private
* playlist-modify-public
Library
* user-library-modify
* user-library-read

Comment your code to make it understandable by a junior analyst.
Print logs so that I can see the script's progress.
Once you are done, update CLAUDE.md accordingly.
When Claude is done, open a new Terminal tab, and execute the app:
cd ~/Documents/spotify-shuffler
pyenv local
python login.py
In your browser, visit http://127.0.0.1:8080 and log in with your Spotify credentials.
Once you are done, you can enter Ctrl-C in the Terminal tab to stop the server.
Create a script that collects your Liked tracks
Instruct Claude:
Now, we will create a series of Python backend scripts, which aim to read my Liked tracks, shuffle them, and save the resulting track list to a new Playlist.

For now, let's focus on the first script, which will be called read-tracks.py.

This script should simply read my Liked tracks and save them into a local file called `my-liked-tracks.json`. It uses the requests library to make API calls.

The `my-liked-tracks.json` file will contain a list of track objects.

Ensure that you use the official Spotify API documentation at https://developer.spotify.com/documentation/web-api, where Liked tracks are called Saved tracks (see the relevant API docs here: https://developer.spotify.com/documentation/web-api/reference/get-users-saved-tracks).

Note that I have several thousand Liked tracks. Given that Spotify returns 50 tracks at most by API call, and that the rate limits are unknown but implemented for 30-second windows, you must space out API calls (say, every 10 seconds), and manage the situation where the API call may return a 429 error so that you can pause and continue.

Remember that the Spotify access tokens are saved in spotify_tokens.json.

Comment your code to make it understandable by a junior analyst.

Print logs so that I can see the script's progress every time an API call is made or an error is detected and handled.

Once you are done, update CLAUDE.md accordingly.
In the other Terminal window, execute the script:
python read-tracks.pyThe output will likely look like this:
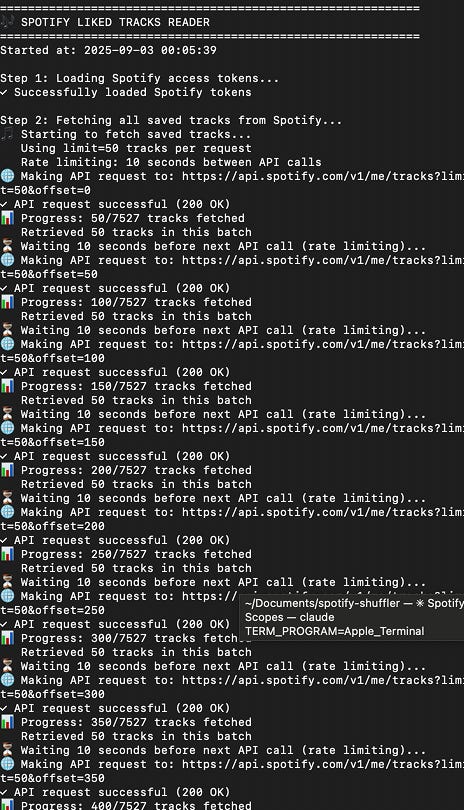
Using Cursor, you should be able to see the list of tracks in the my-liked-tracks.json file.
Create a script that shuffles tracks and creates a new playlist
Instruct Claude:
Now, let's create another Python backend script, called shuffle-tracks.py.

This script:
* Creates a new private playlist, called shuffle-xxxx where xxxx are 4 random digits (refer to the API doc here: https://developer.spotify.com/documentation/web-api/reference/create-playlist)
* Reads my Liked tracks which are already saved locally under my-liked-tracks.json as a list of track objects. Check the structure of that file by reading the first 100 lines.
* Reorders these tracks randomly to create a new list of track URIs (the track URI is the uri field of the track object).
* Adds these reordered track URIs to the newly created playlist (refer to the API doc here: https://developer.spotify.com/documentation/web-api/reference/add-tracks-to-playlist)

Note that a maximum of 100 tracks can be added to a Playlist in one request, but I have several thousand Liked tracks. Spotify implements rate limits for the API. The rate limits are unknown but are implemented in 30-second windows. Therefore, you must space out API calls (e.g., every 10 seconds) and manage situations where the API call may return a 429 error, allowing you to pause and continue.

Remember that the Spotify access tokens are saved in spotify_tokens.json.

Comment your code to make it understandable by a junior analyst.
Print logs so that I can see the script's progress every time an API call is made or an error is detected and handled.
Once you are done, update CLAUDE.md accordingly.
In the other Terminal window, execute the script:
python shuffle-tracks.pyThe output will likely look like this:
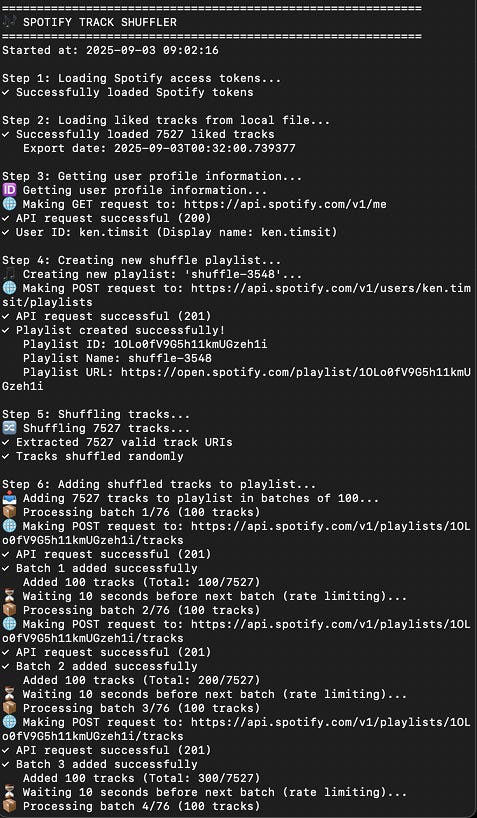
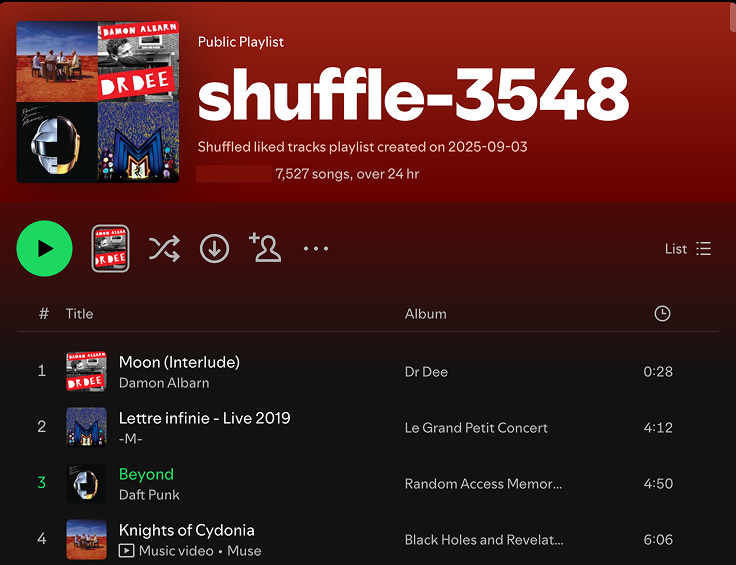
Congratulations! You can find your newly created playlist in your Spotify app:
Create a script that aggregates all previous scripts
Instruct Claude:
Python backend script, called main.py.

This script will:
1. Check if the Spotify access tokens saved in spotify_tokens.json are valid, and refresh them if they need to be refreshed, or instruct the user to run `python login.py` if the user must log in again.
2. Pause to print out what the script is about to do, and require the user to confirm with Yes/No (Y/N).
3. Execute the two following scripts in sequence: read-tracks.py and shuffle-tracks.py
3. Print a final message to inform the user that the script is completed.

Comment your code to make it understandable by a junior analyst.
Print logs so that I can see the script's progress.
Once you are done, update CLAUDE.md accordingly.
Next time that you need to run the app, you can execute the following commands:
cd ~/Documents/spotify-shuffler
pyenv local
python main.py
You are done! Unless you wish to use Claude Code to customize the app further. For example, you could create other scripts that shuffle existing playlists, instead of your Liked tracks.
Takeaway messages
Coding agents like Claude Code work best with precise instructions rather than vague "vibe-coding" requests to produce quality, stable software. Think like a product manager who clearly communicates workflows and requirements.
The initial technical setup (Terminal, Python, Node.js) is painful, but it’s a one-time investment that unlocks powerful development capabilities.
Real-world problems make excellent learning motivators. To learn how to use coding assistants, work on personal or professional mini-projects that solve everyday frustrations.